lunes, 28 de enero de 2013

Otro chaleco Naii- Another Naii Vest

Hace tiempo Naii nos enseñó cómo hacer un chaleco para nuestros peques, y yo le hice uno a Pablo (ver aqui), pues me aventuré a adaptar el patrón que nos envió Naii para mi sobrino de 10 años, ya bastante grande. Como no me fiaba mucho de mis dotes de inventar patrones, le pedí a mi cuñada una camiseta de mi sobrino para adaptar el patrón más fácilmente. 
Long time ago, Naii sae us how to make a vest for our kids, and I did one to Pablo(see here), so I ventured to adapt the pattern sent by Naii for my 10 years old nephew, who is quite large. As I didn't trust my skills to invent patterns, I asked my sister in law one of my nephew's t-shirt to more easily adjust the pattern.

La verdad es que no sé qué hice, pero el resultado fue un chaleco muy largo. No hice foto del cómo le quedaba antes, porque se lo quitó como una bala de rápido, pero os enseño cómo era el antes de arreglarlo:
The truth is I don't know what I did, but the result was a really long vest. I didn't take a picture of it with him, because he took off as fast as a bullet, but I'll show you how it was before I fixed it:


Le hice unos bolsillos laterales, siguiendo las instrucciones de Naii.
I made some side pockets, following the Naii's instructions.

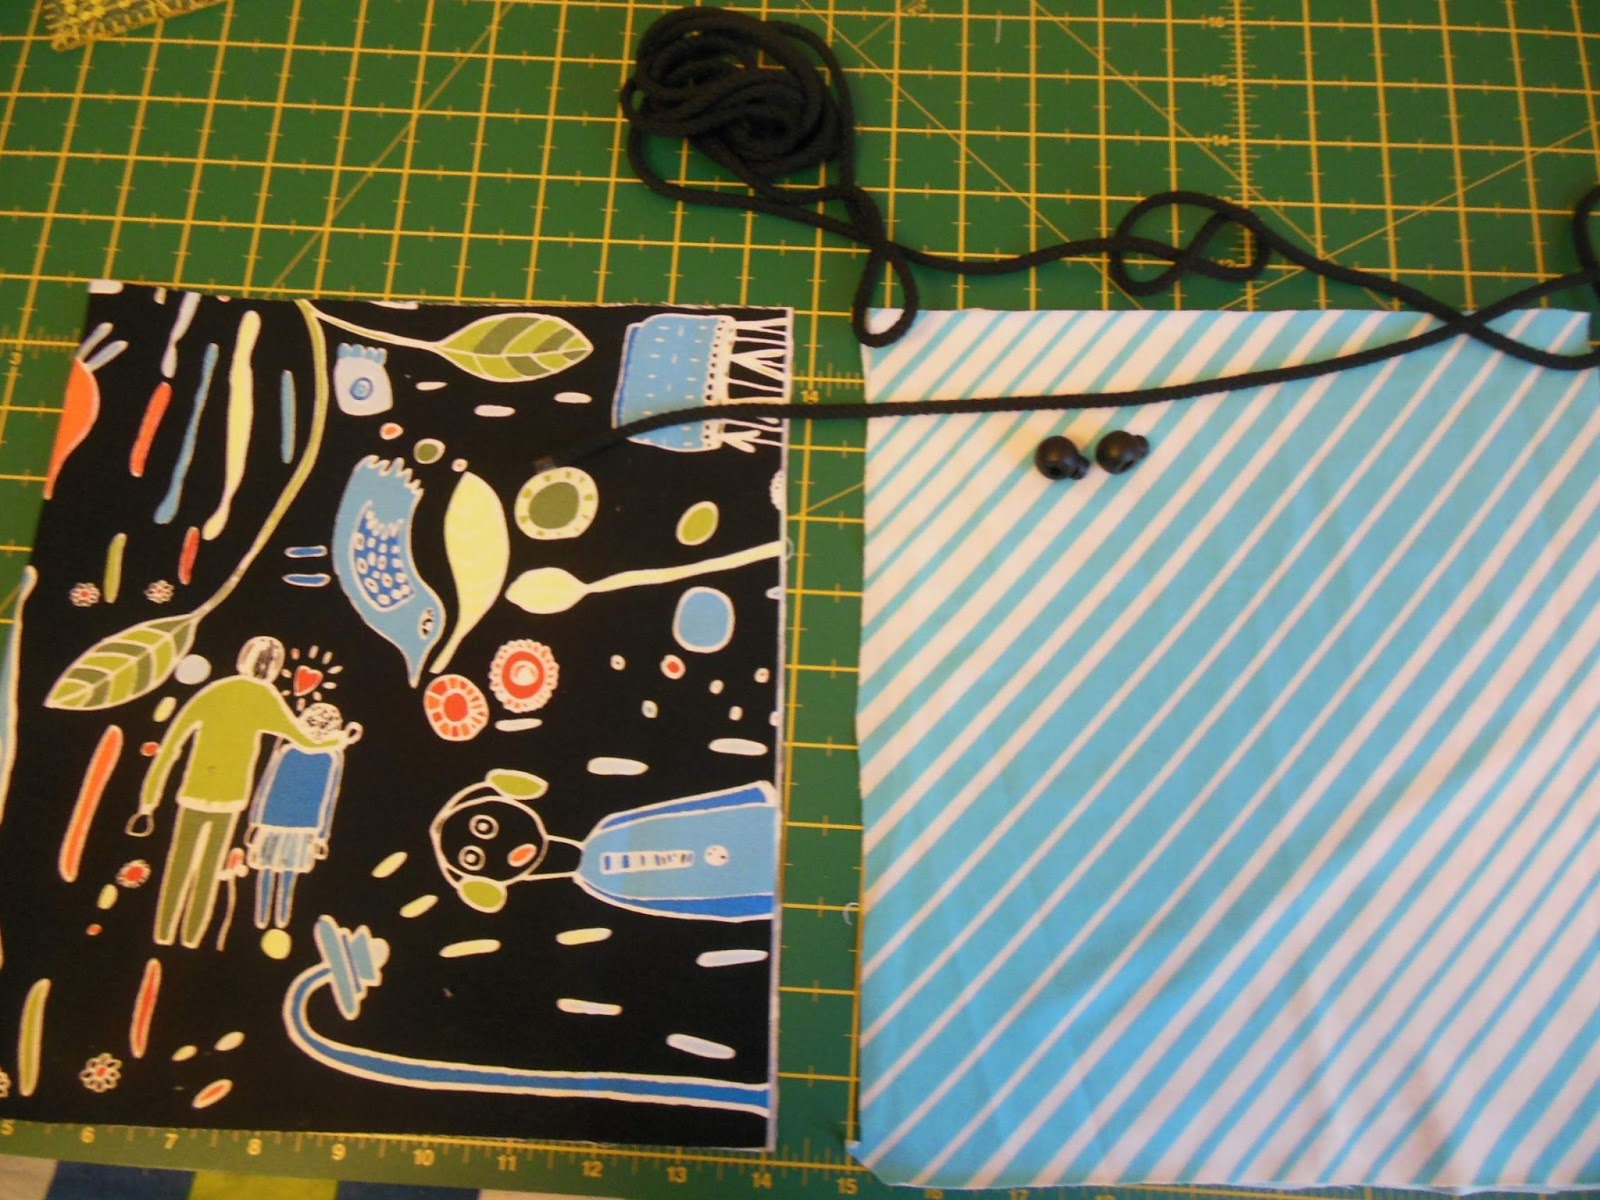
Forré el gorro con la misma tela de los bolsillos, y los muñecajos de la parte de delante.
I covered the cap with the same fabric of the pockets, and men in the front.

Y le puse la etiqueta, el remate de este cuello me quedó mucho mejor!
And I put the tag, the closing of the neck was much better this time!

Pero como os he dicho antes, le quedaba muy largo y además, al envolverlo para regalar y poner en rotulador su nombre: "Imanol", ahhh!!!! el rotu atravesó el papel, con tan mala leche que hizo un puntito aquí, en el p.... medio....
But as I said before, it was very long for him and also when we  wrapped the gift and put his name with a marker: "Imanol" ahhh! the marker pierced the paper and made ​​a dot here in the f... middle....

 
Había que arreglarlo, así que... I had to fix it, so...
1. Recortar un buen trozo, con esto me cargaba los bolsillos y los adornos delanteros (no muy logrados por otra parte)
Cut a chunk, with this I broke the side pockets and the front embellishments (not quite achieved otherwise)

 2. Tapar el punto de rotulador, para ello le he puesto 2 nubes de fieltro.
Cap the marker point, for that I've put two clouds of felt.

3. Había que hacer algo en la parte de delante, para tapar a los 2 señores que hice y que no quedara mal. Así que ahí veis al Angry Bird que le hice, es el que más me gusta...
I had to do something in the front, to cover the two gentlemen. So there you see the Angry Bird that I made, this is the one I like most...

Y le he puesto los ojos con relieve, ya que los tenía, que los compré hace un tiempo en los chinos. 
And I've laid eyes with relief, because I had them, I bought some time ago in the Chinese store.

 4. Y ya lo he completado un poco más, poniéndole la misma tela en las mangas y en el bajo, para darle más uniformidad. 
And I've completed a little more, putting the same fabric on the sleeves and hem, to give more uniformity.


 Y este es el resultado final del nuevo chaleco para Imanol...
And this is the final result of the new vest for Imanol ...


Creo que ha ganado con el cambio. I think it looks much better now.

Esta vez si le hice fotos, así que ahora ya puede presumir delante de sus colegas, porque sale en mi blog!!!! Le hacía mucha ilusión, así que esta entrada está dedicada de lleno a Imanol:
This time I took pictures, so now he can show off to his friends, he is on on my blog!! He was excited, so this post is dedicated entirely to Imanol:

Y aquí los primos, el día que se lo llevamos arreglado, con el mismo chaleco! Ideales de la muerte!
And here they are, the cousins ​​with the same vest! Amazing!

viernes, 25 de enero de 2013

Mochila o Backpack

Pues no sé por qué me dio por hacer una mochila, un gran riesgo, y bueno, el resultado es mucho más que deseable, porque me he complicado la vida de una manera... madre mía! Pero bueno, después de tenerla abandona unas semanas, la he acabado, y creo que la usaremos. I do not know why I got to do a backpack, a bit risky, and well, the result is more than desirable, because I have complicated my life a lot... oh my God! Anyway, after a few weeks of leaving it stopped, I've finished, and I think we will use it.

Aquí os enseño la mochila sosa que usamos ahora, bueno negra, sencilla, funcional... para llevar las toallitas, merienda, juguetes, el agua, los móviles, la cartera....Here I show the actual backpack that we use now, it's black, simple, functional ... to carry wipes, snacks, toys, water, mobile, wallet ....

Y aquí nuestra nueva mochila superfashion...., si, si, con la tela de Ikea de nuevo, pero esto es lo último que hago con la tela de Ikea en cuestión, de momento, claro... nunca se sabe cuando podemos tener otro arrebato... jejeje
And here our new superfashion backpack...., yeah, yeah, with Ikeas fabric again, but this is last thing that I do with that fabric in question, for now, of course ... never know when we have another outburst ... lol

¿Cómo se me ocurrió la idea? Cuando fui a la piscina con mi mochila, y la cremallera exterior no respondía, se me abría sola, y pensé tengo que cambiar de mochila... pero ¿tiro esta? ¿Le cambio la cremallera? ¿La puedo reusar? Recycling, reclycling...
How I got the idea? When I went to the pool with my backpack, and exterior zipper didn't respond, it opened alone, and I thought I have to change the bag ... but what con I do with this on? Would you change the zipper? Can I reuse it? Recycling, reclycling ...

1. Como veis la mochila original es más grande que la objetivo a realizar
2. Desguace de la mochila, extrayendo las partes que podía reusar
3. En la trasera, le añado más guata para hacerla más acolchada, y que no se resienta la espalda
4. Lo mismo hago con los tirantes.
1. As you can see the original is larger that aim to make

2. Dismantling of the pack, removing the parts that could be reused
3. At the rear, add it to make it more batting quilted
4. I do the same with the straps.


Tengo fotos de todo el proceso, pero ha sido "muy sobre la marcha" y muy estresante. Os dejo algunos momentos:
1. Coso los tirantes y le voy dando el primer contorno
2. En el bolsillo exterior preparo unos departamentos para que los móviles no anden volando
3. Momento cremallera, mira que le he dado vueltas para ver cómo coserlo!
4. Ya tengo las 2 cremalleras cosidas, pero me queda lo que tenía que haber hecho al principio y que no hice porque no pensé y porque no lo he hecho muy organizadamente que se diga..., la parte de abajo, el cierre final. Llevo días y días con esto, y frustración, por fin hoy lo he acabado, como he podido...
I have pictures for the whole process, but has been "on the fly" and very stressful. I leave you some moments here:
1. I sewed braces and I'll give the first contour
2. Prepare some departments in outside pocket for mobile phones
3. Moment zipper, look I gave laps to see how to sew it!
4. Now I have the 2 zippers sewn, but I don't have what I should have done at first and I didn't because I didn't think and because I haven't done it very organized..., the bottom part, the final closing. It took me days and days, and frustration, I finally finished today, as I can...


Y aquí os dejo unas fotos del resultado final:
And here you have the final result
La mochila por delante
The front side

 Los tirantes por detrás
The back side
Una vista lateral (no se aprecia bien la chapuza del cierre de abajo...)
A lateral side (you cannot see very well how bad is sewn the bottom part, really)

El bolsillo exterior por dentro. Los remates dejan mucho que desear, esto es a parches, como el patchwork no? jeje
The outside pocket on the inside. The shots are very poor, this is a patch, as the patchwork, isn¡t it? hehe

Ahhhh!!! Pues se acabó la creatividad por ahora, a ver si ahora podemos dedicarnos a tareas más sencillas... qué estress que me ha causado esto! Madre mía!!!! Lo bueno es que mi marido cuando la ha visto me ha dicho "qué chula!" y yo... "bueno tiene fallos por aquí, por allá" y él "bah, cuando la rellenes con cosas ni se nota", qué encanto! ^-^
Ahhhh! Well that's it for now, let's see if now I can dedicate  to simpler tasks ... What a high stress this has caused me! My God!!! The good thing is that my husband when he saw it said "hos nice!" and I ... "Well... it has faults here and there" and he: "bah, when you fill it with things you don't even noticed," how charm! ^-^

miércoles, 23 de enero de 2013

Bolsa juguetes- Toys' bag

Sí, si, de nuevo la tela del Ikea, pero es que me ha dado mucho juego! Ya solo me queda una última cosa que tengo entre manos...
Yes, I know, once again Ikea's fabric, but it was amazing! Now I just have one last thing to finish using this one...

Aquí os enseño una bolsita para guardar cosas dentro de la mochila donde llevo la merienda, juguetes y varios de Pablo cuando salimos fuera. De momento se ha convertido en la bolsa de los juguetes. Finalmente encontré el cordón negro, y las cosas para introducir el cordón negro, para poderlo cerrar. He forrado la bolsa, cogiendo una tela de una camiseta reciclada.
Here I show you a bag to store things in the backpack where I have some snacks, toys and several thing for Pablo to go out. For now it has become the bag fortoys. I finally found the black lace, and the things to enter the black cord, so that it can be closed. I lined the bag, grabbing a recycled t-shirt fabric.

He usado la overlock para juntar los lados, pero como véis sigo con los colores originales de la máquina. ¿Los cambiaré algún día?
I used the overlock to raise the sides, but as you see I still have the original colors of the machine. Do'll change someday?


He cosido los laterales y el bajo para hacer el cierre (un tanto chapu), pero es que quería acabar rápido y me ofusqué un poco...
I stitched the sides and low for closure (not too professional), but I wanted to finish fast and I obfuscate a bit ...

He hecho el doblez arriba para meter el cordón
I made the fold up to put the cord

Y he pasado el cordón por el dobladillo.
And I spent the cord through the hem.

Ya tengo la bolsita con el cierre para llevar los juguetes de Pablo, si no entra ahí no sale a la calle... así que cochecitos o mini-súper-héroes...
I have the bag with closure for carrying Pablo's toys , if not get in there it doesn't go out ... so strollers or mini-super-heroes ...
Muy práctica...
Very practical...

lunes, 21 de enero de 2013

Sorteo Snapclic (spanish)

Pues  yo también me uno a este sorteo propuesto por Snapclic, sortean 300 de estos maravillosos snapclics... Para ello puedes tener varios puntos en función de lo que hagas para publicitar la entrada. No suelo participar en estos sorteos, pero... realmente estoy interesada en este producto...

Hace tiempo me compré unos alicates de estos similares, y me han resultado ser un fiasco, pero veo que todas usáis snaps de estos y ya os he preguntado a varias, pero hasta la semana pasada no decidí que quería uno de estos. Fue en la visita a casa de Oiane cuando me enseñó su alicate y los snaps, y me hizo una demo de cómo funcionaba y lo bien que agarraban, me puso los dientes largos...

Así que me dejó unos cuantos de muestras para probar con mis alicates, y ohhhh, no funcionan mis alicates con estos snaps, así que la decisión estaba tomada: me tengo que comprar unos, y este sorteo ha hecho que se me pongan los dientes largos de verdad, y... me he registrado y todo en la página para comprarlos...
¿Dónde guardamos los snapclics? Pues los poquitos que me dejó Oiane están con mis alicates "viejos"... habrá que buscarle sitio a los que he pedido en la web... quiero ver todas vuestras ideas, me vendrá de perilla...

Suerte a todas!

Estuche para mi sobrino- Case for my nephew

Y no podía ser menos mi sobrino, al que no le iba a hacer un bolso como a mis sobrinas... no todos los regalos son para niños y para niñas... (ver entrada aquí), así que le he hecho un estuche, eso sí con la misma tela. Para ello me he basado en el tutorial de Naii, con algunas variaciones que he visto por youtube. En mi caso he puesto la misma tela por fuera y por dentro, y le he puesto guata en el interior para hacerlo como acolchado. Para decorarlo le he puesto unas costuras en zig zag a lo largo. 
And my nephew, has also his gift, who was not going to have a bag as my nieces ... not all gifts are for boys and girls ... (see post here), so I've made ​​a case, with the same fabric. To do this I have relied on Naii's tutorial, with some variations I've seen on youtube. In my case I have the same fabric on the outside and inside, and I put padding on the inside to make it as mulch. To decorate I put zigzag seams throughout.

Este es el estuche cerrado, solo le he puesto un agarradero a un lado. 
This is the case closed, only I put a handle on one side

Y este es el estuche abierto y cargadito de cosas para el colegio.. 
And this is the case open and full of things for school ..

Aquí podéis ver las costuras en zig zag a lo largo, igual hubieran quedado mejor en blanco para destacar...
Here you can see the zig zag stitching throughout, as would have been better in white to highlight ...


Este es el interior, no se llega a apreciar el acolchado...
This is the inside, do not get to appreciate the padded ...

Y cómo no, la etiqueta, en este caso va cosida
And of course, the label in this case is sewn

No veas qué contenta me he puesto cuando mi sobrino lo ha abierto en casa de la abuela y ha gritado: "¡bien, otro estuche!" Y luego le ha dicho a su madre que prefería llevar este estuche al cole en vez de el de Spiderman (comprado, por supuesto), jejejeje
I get so happy when my nephew opened the present in Grandma's house and he shouted: "Good, another case!" And then he told his mother that he preferred to take this case to school instead of the Spiderman (purchased, of course), hehehehe. 

Y aquí tenéis al Capitán América (mi sobrino) con su estuche!
And here's Captain America (my nephew) with its case!


viernes, 18 de enero de 2013

Bolsitos para las sobrinas. Little purses for my nieces

Al final me he animado a hacer mi primer bolso, bueno ya hice una especie de bolso para el amigo invisible (ver aquí), pero ahora lo he intentado hacer mucho más profesional, añadiendo un bolsillo interior con cremallera y una cremallera exterior. Estas eras las 2 características que me pidió mi hermana para los bolsos de una chavalita de 12 años, que ya llevan sus dineros, las llaves de casa y el móvil. Todo bien cerrado y atado. 
Finally I've decided to make my first bag, well I did a kind of bag for secret Santa (see here), but now I've tried to do a much more professional one, adding an inside zip pocket and an outer zippered. These were the two features that my sister requested for bag for a 12 years old girl, who have their money, house keys and mobile. All tied tightly closed.

Así que para mí era un gran reto. El problema de la cremallera lo solventé muy fácilmente siguiendo el fantástico tutorial de Charo (ver aquí), con la cremallera exterior no tuve problemas, mi mayor problema han sido las tiras para cruzar el bolso, esto es algo a mejorar, pero bueno, aquí os dejo el resultado.
So for me it was a great challenge. The problem of the inside zipper was easily solved by following the fantastic tutorial from Charo (see here), with exterior zipper no problems, my biggest problem has been the strips across the bag, this is something to improve, but hey, here I leave the result.

¿Os suena la tela? Mira que me ha dado juego la tela, pero es que es muy bonita! En un bolso he puesto en la portada a dos señores en la parada del autobús con un perro. Y en el otro, a una chica  con su bolso. 
Does it sound the fabric? I have used this fabric for a lot of things..., but it's very nice! I put in the front side of a bag  two people at the bus stop with a dog. And on the other one, a girl with her ​​purse.


Y aquí veis los dos bolsos con sus tiras para cruzarlos
And here you see the two bags with straps to cross


Un detalle de la cremallera exterior. An outside zipper detail

Y un detalle de la cremallera interior, junto con la marca del bolso, me encanta cómo queda! Parece más profesional, verdad?
And an inside zipper detail, along with brand bag, I love how it looks! It looks more professional, right?
Finalmente un detalle del bolsillo abierto:
Finally, a detail with the open pocket.

Y aquí veis a las dos nuevas dueñas de estos bolsos, qué bien les quedan!
And here you see the two new owners of these handbags, how nice they are!

martes, 15 de enero de 2013

Customizando camisetas- T-shirts customizing

Hola de nuevo! Hello again!
Esta entrada va a mostrar cómo customizar algunas camisetas, pero no sólo eso, sino también os va a contar lo maravilloso de este mundo bloguero y las amigas que puedes conocer a través de este mundo. 
El pasado sábado recibí un mail de Oiane (del blog: Costura con Ternura) en el que me invitaba a su casa a customizar unas camisetas con unas amigas suyas. Oiane y yo sólo habíamos "chateado" por los blogs, dejándonos comentarios mutuamente, pero habíamos congeniado! Al principio no sabía que hacer... ir a casa de una persona que no conozco, parecía una cita a ciegas... jejeje... pero por otro lado me apetecía hacerlo, era para el domingo por la tarde, llovía... ¡qué mejor plan!
This entry will show how to customize some t-shirts, but not only that, I will tell you how wonderful this blogger world is and how you can meet new friends through this world.

On Saturday I received an email from Oiane (Blog: Costura con Ternura) in which she invited me to her house to customize a shirt with some of her friends. Oiane and I only had "chatted" through our blogs, leaving comments with each other, but we hit it off! At first I did not know what to do... go to a person's house who I do not know, it seemed a blind... hehehe... but on the other hand I wanted to do it, it was for Sunday afternoon, it rained ...What a good plan!


Así que allí me planté, y conocí a dos amigas suyas: Cris e Iratxe, no nos conocíamos entre nosotras, y la verdad es que no sé quién de las 4 hablaba más, así da gusto! Estuvimos allí 4 horas!!!! y aunque no fueron muy productivas... se pasaron volando! Ellas customizaron unas camisetas para sus hijos, yo... ¿egoísta? para mí... jejejeje... 
So there I went, and I met two of her friends: Cris and Iratxe, we didn't know each other, and I really don't know which one of us spoke more than the other, so glad! We were there 4 hours!! so they weren't very productive.  They customizaron some shirts for their children,  and I... Selfish?? for me ... hehehehe ...

La técnica es bastante sencilla, pero yo no la había hecho nunca, esto es un mundo y no me da tiempo a probar todas las cosas, jeje... la clave está en tener fliselina de doble cara, para que se planche por dos lados. Después, lo importante es elegir el diseño: una manzana? una patata? noooo... esto llevó bastante tiempo, al final Oiane e Iratxe eligieron un perrito y Cris una calavera. Yo le copié el diseño a Oiane de una camiseta que le hizo a su hija hace tiempo (ver aquí) unas chanclas o hawaianas. Después elegir las telas, es cuando Oiane saca su montón de telas, todas superbonitas y hay que elegir telas, y también abalorios de mercería (lacitos, y otras cosas que no sé qué nombre tienen... jejeje). Y ya manos a la obra!
The technique is quite simple, but I hadn't ever done, this is a huge world and I don't have time to test everything, lol ... the key is to have double-sided fleece, to be ironed on both sides. After that, the important thing is to choose the design: an apple? a potato? noooo ... it took a long time, at the end Oiane and Iratxe chose a puppy and  Cris a skull. I copied the design of a T that Oiane did to her daughter long ago (see here) with Hawaiian flip-flops. After choosing fabrics, is when Oiane takes his pile of fabrics, all supernice and we had to choose fabrics, ribbons,... And get to work!

Pegamos la tela a la fliselina por una cara (con la plancha), calcamos el dibujo por la otra parte de la fliselina y recortamos (tela con fliselina) quitamos el papel del otro lado de la fliselina y y colocamos el aplique en la camiseta, volvemos a planchar. Así de sencillo! Pero para que la tela no se deshilache con los lavados y los usos, pasamos un bordado alrededor. 
We ironned the fabric to the fleece on one side, copied the drawing on the other side and cut the fleece (fleece with fabric) remove the paper from the other side of the fleece and put the applet on the shirt to be ironing. It's that simple! To fix to the cloth we had an embroidered around.

Aquí os dejo los resultados/ Here you have the final results:

  • Este es el de Iratxe, bueno para su peque de 8 meses...: un perrito a lo Lacoste, azulito con lunares blancos y la correa marrón. Bordado en azul marino. This is Iratxe's, well for her 8 months old kid...: a puppy similar to Lacoste, in blue with white spots and brown belt. Embroidery in navy.


  • Este es el de Oiane: otro perrito, pero algo más grande, para una camiseta de Sofía y en el centro de la camiseta. El lacito del perrito es el no va más. This is Oiane's: another puppy, but much bigger, for a Sofía's tee in the center of the shirt. The puppy bow is the ultimate!

  • Este es el de Cris, para su peque de 5 años, después de buscar varias opciones de Angry Birds y ir por ahí divagando... esta calavera superchula en un lateral. Con tela de fieltro y relleno! Para darle más profundidad! This is for Cris' 5 year old kid, after searching several options of Angry Birds... she selected this beatiful skull to sew on one side of the T-shirt. With felt fabric and filling! To give it more depth!
  • Y esta es la mía. Era una camiseta blanca y mi patrón fueron las chanclas de Sofía, la peque de Oiane, elegí dónde ubicarlas, debajo del pecho... Quedaron así de bonitas... And this is mine. It was a white T and my pattern were Sofía's hawaians, I choose where to locate, under the breast ... They were pretty well on ...

Pero al extender la camiseta, y ponérmela, como que había un gran vacío por arriba... Le pedía algo más... Así que Oiane me dio algo más de tela y fliselina para que me hiciera algo en mi casa por arriba (que si me quedo allí a hacerlo, igual me dan las 12 de la noche!!! jeje)
But when you extend the shirt, and wear it, seems like there was a big gap up ... I wanted something more ... So Oiane gave me some more fabric and fleece to make me something in my house (if I'm there to do this, it will take me another 4 hours to finish! Hehe)


Y este es el resultado, con la sombrilla y un balón de playa en la parte de arriba. Ahora ya no están tan solas las chanclas...
And this is the result, with the umbrella and beach ball on top. Now the flip flowps are not so alone...


Y aquí con la modelo dentro (o sea yo), es una camseta muy veraniega! Ha pasado a ser una camiseta de manga corta sosa a una camiseta única y original. ¿Qué os parece el resultado?
And here with the model inside (ie me), it's a very summery shirt! It has become from a short sleeve namby-pamby shirt to a unique and original one. What do you think of the result?

Muchas gracias Oiane por organizar la sesión de ayer, y enseñarnos a hacer estas cositas, y de verdad te animo a ese proyecto futuro a ver si sale, un cambio radical en tu vida, pero a veces sienta de maravilla! Encantada de conocer también a Cris y a Iratxe! Espero volver a coincidir algún día con vosotras!
Oiane thank you very much for organizing yesterday's session, and teach us to do these little things, and I really encourage you to  go ahead with that future project, a radical change in your life, but sometimes it feels great! Nice to know Cris and Iratxe! I hope to see you anytime!

domingo, 13 de enero de 2013

Estampando- Stamping

Pues llevaba tiempo con ganas de pintar, estampar o colorear tela, ya que veo que muchas de vosotras lo habíais hecho, y he estado como loca buscando los materiales. Mi primera opción fue la de hacer los sellos de goma que nos propone Dawn de Mi Rincón de Mariposas (ver aqui), pero no he encontrado por ningún sitio los artilugios de tallar. Y la pintura para tela tampoco era fácil de encontrar. 
Well, it was a long time since I wanted to paint, stamp or color some fabric, as I see what many of you had done, and I've been crazy looking fr the appropriate materials. My first choice was to make the rubber seals that proposes Dawn from Mi Rincón de Mariposas (see here), but I haven't found anywhere the gadgets for carving. And the painting for fabric wasn't easy to find.

Pero no dejaba de buscar hasta que he encontrado una tienda en Bilbao La trastería de Goya, es una tienda dedicada exclusivamente a manualidades y es una tentación! Allí encontré la pintura que veía en vuestros blogs para tela, y rotuladores. Así que compré los 3 colores básicos en pintura y un rotulador de tela para probar. No pregunté por las herramientas de tallar.
But I kept searching until I found a shop in Bilbao "The Clutter of Goya", is a shop dedicated exclusively to craft and is a temptation! There I found the painting that I saw in your blogs to fabric, and markers. So I bought the 3 basic colors in paint and a fabric marker to test. I didn't ask for carving tools.

Otro día fui a un megachino que hay cerca de mi casa (Litxu) y ahí han ampliado el surtido y ahora hay un montón de cosas de manualidades, así que mira lo que me traje. Además de varias pinzas de diversos tipos que me encantaron, encontré unas pegatinas de goma EVA, con números, letras y animales. Así que se me ocurrió que esto podría ser algo muy bueno para hacerme unos sellos más fácilmente.
Another day I went to a megachinese shop, near my house (Litxu) and that have extended their assortment and now there are a lot of craft things, so look what I brought. Besides several clips of various types that I loved, I found some EVA stickers, with numbers, letters and animals. So I thought this might be a good thing to make me some stamps easier.

Pero antes de probar con algo definitivo, me puse manos a la obra a probar y experimentar.
Primero escribí con el rotulador, no me convence, porque la tela se me mueve al escribir (es tela de camiseta)
But before trying something definitive, I decided to try and experiment. First I wrote with the marker, I'm not convinced, because the fabric moves when I write (it was T-shirt fabric)

Después decidí seguir con los sellos de goma EVA, y la pintura de tela. Primero había que elegir al sello conejillo de indias...
Then I decided to stick with the EVA stamps, and fabric painting. First I had to choose to label to use...
Y este fue el elegido, una flor. No tenía maderas donde pegarlo, así que improvisé con este rollo de cartón. Mi cuñado (carpintero) ya me ha preparado unos bloques de madera que serán mis futuros sellos, ya os enseñaré cuando los tenga...
And this was the selected one, a flower. I didn't have piece of woods where to glue, so I improvised with this cardboard roll. My brother in law (carpenter) has prepared me woodblock that will be my future stamps, and I will show you when I have them...

Y comenzamos a pintar. ¡Qué divertido! And we began to paint. How funny!


La primera flor ha quedado un poco chafada, pero es que no limpié bien los bordes de la pintura excedente del sello... Así vamos aprendiendo...
The first flower has been a little mashed, but I didn't wipe the excess paint edges seal ... So we are learning ...
¿Veis? Ha sobrado pintura en el cartón que es lo que me ha manchado la camiseta- 
See? Unused paint on the cardboard that is what I have stained the shirt

Poco a poco, vamos mejorando la técnica...
Little by little, we are improving the technique ..

Probamos también con el pincel directamente, para probar...
We tried also with the brush directly to test ...

Y aquí mi obra de arte completa:
And here my work of art:

Si vemos el revés de la tela, vemos que en muchos casos traspasa, así que mejor poner algo en medio, por si acaso!
If we see the wrong side, we see that in many cases passes, so you better put something in the middle, just in case!
Dejamos que se seque bien, yo deje unas horas, no recuerdo ahora cuánto tiempo pone en el bote.
We let it dry well, I leave a few hours, I don't remember how long puts in the pot.

Después planché, tal y como dicen las instrucciones, un buen rato, para que se fijara bien la pintura. Y finalmente lo lavé en la lavadora, para ver el resultado. Y aquí lo tenéis, la verdad es que no ha perdido nada los colores, ni del roturador, ni de los sellos.
Then ironed, as the instructions say, a good time, so that the paint was fixed. And finally washed in the washing machine, to see the final result. And here it is, the truth is that it hasn't lost any color.

Ya estoy lista para estampar definitivamente algo de tela antes de coserla, qué divertido! Ya os enseñaré a ver qué hago... Tengo que pensarlo, pero será algo para Pablo...
I'm definitely ready to stamp some fabric before sewing it, how funny! I will show you what I do ... I have to think about it, but it will be something for Pablo...